
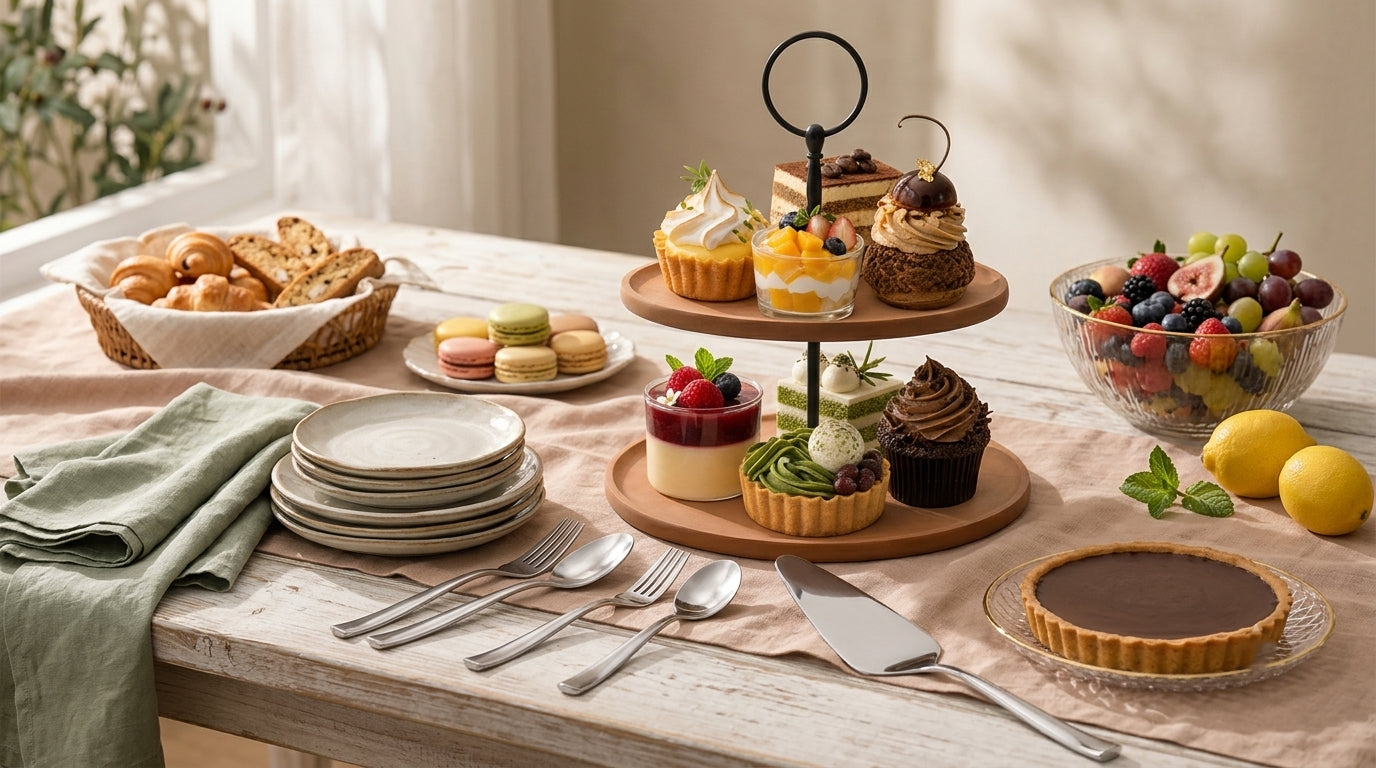
A dessert table does more than hold sweets. It creates a moment.
Whether it is a birthday, brunch, tea party, holiday dinner, baby shower, graduation, or simple weekend gathering, a well-arranged dessert table makes the occasion feel more thoughtful. It gives guests a place to gather, makes desserts easier to serve, and turns cakes, pastries, fruit, cupcakes, and small bites into part of the table design.
The best dessert table does not need to be complicated. It needs structure, height, balance, serving tools, clean surfaces, and enough space for guests to serve themselves comfortably.
A tiered serving stand can add height without taking up too much table space. A pastry server can lift cake and pie cleanly. A cutting board can hold fruit, bread, cheese, or small desserts. Flatware and dessert spoons help guests serve and enjoy food without searching for utensils at the last minute.
This guide breaks down how to set up a dessert table at home, what pieces to use, how to arrange desserts, how to choose serving tools, how to style the table without overcrowding it, and how to make hosting feel polished but still easy.
In This Guide
- The Quick Answer: How Do You Set Up a Dessert Table?
- What Makes a Dessert Table Look Beautiful and Functional?
- Start with the Table Layout
- Use Height to Make the Dessert Table More Interesting
- Cupcake Stands and Tiered Serving Trays
- What Desserts Work Best on a Tiered Stand?
- Serving Boards for Fruit, Bread, Cheese, and Small Bites
- Pastry Servers, Cake Servers, and Dessert Utensils
- How to Arrange Desserts by Size, Color, and Texture
- How Much Dessert Do You Need Per Person?
- How to Set Up a Dessert Table for Different Occasions
- How to Keep the Table Clean and Easy to Use
- How to Pair Dessert Displays with Flatware and Serving Pieces
- How to Store and Care for Dessert Serving Pieces
- Common Dessert Table Mistakes to Avoid
- Shop Barenthal Dessert and Hosting Essentials
- Frequently Asked Questions
The Quick Answer: How Do You Set Up a Dessert Table?
To set up a dessert table at home, start with a clean table surface, choose one focal point, add height with a tiered stand, arrange desserts by size and type, place serving utensils beside each item, and leave enough open space for guests to serve themselves.
A practical dessert table usually includes:
- One main dessert
- One tiered serving stand
- One flat serving board or tray
- Small plates
- Dessert forks or teaspoons
- Napkins
- Pastry server or cake server
- Serving spoon or tongs
- A simple centerpiece
- Clear labels if multiple flavors or dietary options are included
The strongest dessert table feels organized, not crowded. Guests should immediately understand what is being served, where to pick up plates and utensils, and how to move through the table without reaching across too many items.
A dessert table should look inviting, but it also needs to work. The best setup balances beauty and function.
What Makes a Dessert Table Look Beautiful and Functional?
A beautiful dessert table has visual balance. A functional dessert table has clear flow.
Both matter.
A table can look impressive but be difficult to use if guests cannot reach the desserts, find a serving utensil, or place food on a plate. A table can also be practical but feel unfinished if everything sits flat, crowded, or visually disconnected.
The best dessert table uses three levels of thinking:
- What guests see first
- How guests serve themselves
- How the table stays clean during the event
A Strong Dessert Table Should Have
- A clear focal point
- Different heights
- A balanced color palette
- Enough serving tools
- Plates and napkins within reach
- Space between items
- A mix of whole desserts and small bites
- Clean surfaces for cutting or serving
- A layout that guests can use easily
Dessert table styling is not only about decoration. It is about making the food feel more intentional.
Start with the Table Layout

Before adding desserts, decide how the table will function.
The layout depends on whether guests will walk around the table, serve from one side, or approach from a single direction.
For a small home gathering, a simple front-facing layout often works best. Place the tallest item in the back, the main dessert in the center, and smaller items toward the front.
For a larger event, leave space on both sides so guests can move more easily.
Simple Dessert Table Layout
- Back row: taller pieces, tiered stand, flowers, cake, or centerpiece
- Middle row: trays, boards, pastries, cookies, fruit, cupcakes
- Front row: plates, napkins, forks, spoons, tongs, pastry server, labels
This layout keeps the table easy to read. Tall pieces create visual interest without blocking access to smaller desserts.
Layout Rules That Work
- Place the tallest item toward the back or center.
- Keep plates and utensils near the front.
- Put serving tools beside the dessert they belong to.
- Leave space around items that need to be sliced.
- Avoid placing fragile desserts too close to the edge.
- Keep drinks separate if the table is already full.
A clear layout helps guests serve themselves without asking where things are.
Use Height to Make the Dessert Table More Interesting
Height is one of the easiest ways to make a dessert table look more polished.
If every dessert sits flat on the table, the display can look crowded even when the food is beautiful. Adding height creates layers and makes the table feel more designed.
Height can come from:
- A tiered serving stand
- A cake stand
- A raised tray
- A small pedestal
- A wood board placed on a riser
- A dessert platter
- Stacked plates
- A tall floral arrangement
A two-tier stand is especially useful because it adds height while also saving table space. It allows cupcakes, pastries, fruit, cookies, appetizers, or small desserts to be arranged vertically instead of spread across the entire table.
How to Use Height Without Overdoing It
- Use one main elevated piece.
- Keep the rest of the table lower and easier to reach.
- Do not stack too many tall items together.
- Make sure guests can still see and reach the food.
- Use height to create structure, not clutter.
A dessert table should feel layered, not crowded.
Cupcake Stands and Tiered Serving Trays

A cupcake stand or tiered serving tray is one of the most useful pieces for dessert tables because it adds structure immediately.
It helps create a centerpiece without needing a large cake. It can also hold more than cupcakes. A tiered stand can display small foods in a way that feels abundant but organized.
Use a tiered serving stand for:
- Cupcakes
- Mini cakes
- Pastries
- Cookies
- Macarons
- Fruit
- Brownie bites
- Tea sandwiches
- Appetizers
- Holiday treats
- Brunch pastries
- Small desserts
A tiered stand works especially well when table space is limited. By lifting part of the display upward, it leaves more room for plates, napkins, flatware, serving boards, and additional desserts.
When a Tiered Stand Works Best
A tiered stand works best when the desserts are small, easy to pick up, and similar in size.
It is ideal for cupcakes, cookies, pastries, macarons, mini tarts, fruit, and bite-size desserts. Larger cakes, pies, and cheesecakes should usually stay on a flat board, cake stand, or platter where they can be sliced cleanly.
A tiered stand brings height, but the dessert still needs to be easy to reach.
What Desserts Work Best on a Tiered Stand?

A tiered stand is strongest when it holds desserts that are stable and easy to serve.
Place heavier or larger items on the lower tier. Place lighter, smaller, or more delicate pieces on the top tier.
Best Desserts for a Tiered Stand
- Cupcakes
- Mini muffins
- Cookies
- Brownies
- Macarons
- Mini pastries
- Fruit tarts
- Small tea cakes
- Donut holes
- Chocolate truffles
- Petit fours
- Sliced fruit
Foods to Keep on a Flat Surface
- Full-size cakes
- Large pies
- Cheesecakes
- Tarts that need slicing
- Desserts with loose toppings
- Very soft pastries
- Desserts served with sauce
The purpose of the tiered stand is display and access. If a dessert needs cutting, scooping, or delicate handling, it usually belongs on a flat serving surface.
Serving Boards for Fruit, Bread, Cheese, and Small Bites

A dessert table does not need to include only sweets.
Adding fruit, cheese, bread, crackers, or small bites can make the table feel more complete, especially for brunches, tea parties, wine nights, and holiday gatherings.
A cutting board or serving board can hold:
- Sliced fruit
- Grapes and berries
- Cheese
- Crackers
- Bread
- Croissants
- Small pastries
- Dessert bites
- Chocolate
- Tea sandwiches
- Nuts or dried fruit
A board adds a natural, grounded element to the table. It also creates contrast beside polished serving utensils, glassware, and stainless steel flatware.
How to Style a Serving Board on a Dessert Table
- Start with the largest items first.
- Add fruit or cheese in small clusters.
- Leave space for guests to pick up food easily.
- Use a small knife or serving utensil if needed.
- Keep wet fruits away from crisp pastries.
- Avoid overcrowding the board.
A clean serving board can make the dessert table feel relaxed and generous without making it look messy.
Pastry Servers, Cake Servers, and Dessert Utensils

Serving tools are what make the dessert table usable.
A table may look beautiful, but if guests cannot cut, lift, or serve desserts cleanly, the experience becomes awkward. The right utensils help protect the desserts and keep the table organized.
Dessert Serving Tools to Include
- Pastry server
- Cake server
- Dessert forks
- Teaspoons
- Serving spoon
- Small tongs
- Cheese knife
- Butter knife
- Napkins
- Small plates
A pastry server is especially useful for cakes, pies, tarts, cheesecake, brownies, dessert bars, and quiche. It supports the slice from underneath and helps move it from tray to plate without breaking.
What Each Tool Helps With
-
Pastry Server
Best for cake, pie, tart, cheesecake, brownies, dessert bars, and quiche. -
Teaspoons
Best for pudding, mousse, parfaits, fruit cups, coffee, tea, and small desserts. -
Dessert Forks
Best for cake slices, pastries, fruit, and plated desserts. -
Small Tongs
Best for cookies, macarons, fruit, small pastries, and bite-size treats. -
Cheese Knife
Best for cheese, spreads, appetizer boards, and small savory items.
The dessert table should never depend on guests using their personal flatware in shared food.
How to Arrange Desserts by Size, Color, and Texture
A dessert table looks more polished when the food is arranged with intention.
The easiest method is to group by size first, then balance color and texture.
Arrange by Size
- Place larger items toward the back or center.
- Place medium items around the focal point.
- Place smaller bites toward the front.
- Keep delicate items where they are easy to reach.
Arrange by Color
Repeat colors across the table instead of grouping all one color in one area.
For example, if the table includes strawberries, pink macarons, and berry tarts, spread those red and pink tones across the display. This helps the table feel balanced.
Arrange by Texture
Mix different textures:
- Creamy desserts
- Crisp cookies
- Soft cakes
- Fresh fruit
- Smooth chocolate
- Flaky pastries
- Crunchy nuts
- Glossy sauces
Texture makes the table more inviting. A dessert table with only one type of food can feel flat, even if it tastes good.
How Much Dessert Do You Need Per Person?

The amount of dessert depends on the event, meal size, guest count, and whether the desserts are the main focus.
For most gatherings, plan for a mix of small servings rather than one oversized dessert.
Dessert Quantity Guide
Light Dessert After Dinner
1 dessert serving per person.
Dessert Table with Multiple Options
2–3 small pieces per person.
Brunch or Tea Party
2–4 small items per person.
Birthday or Celebration Table
1 cake slice plus 1–2 small treats per person.
Holiday Dessert Table
2–3 dessert options per person, especially if guests will return for seconds.
Simple Planning Rule
Offer fewer dessert types with enough quantity rather than too many desserts in tiny amounts.
Guests enjoy variety, but a table becomes confusing when there are too many small, unrelated items.
How to Set Up a Dessert Table for Different Occasions

Different events need different dessert table layouts.
The same core pieces can work across many occasions: a tiered stand, flat board, pastry server, small plates, flatware, napkins, and a simple table design.
Birthday Dessert Table
For a birthday, the cake is usually the main focal point.
Use:
- One main cake
- Cupcakes or cookies
- Small plates
- Dessert forks
- Cake server or pastry server
- Napkins
- One tiered stand for smaller treats
Place the cake in the center and use the tiered stand to add height on one side.
Brunch Dessert Table
A brunch dessert table should feel lighter and easier to graze.
Use:
- Mini pastries
- Fruit
- Muffins
- Croissants
- Tea cakes
- Yogurt cups
- Small plates
- Teaspoons
- Serving board
Pair sweet items with fruit or bread so the table does not feel too heavy.
Tea Party Dessert Table
A tea party table works well with smaller, delicate pieces.
Use:
- Macarons
- Tea cakes
- Cookies
- Fruit tarts
- Small sandwiches
- Cupcakes
- Tiered stand
- Dessert forks
- Teaspoons
A tiered stand is especially useful here because it gives the table height and a classic tea-service feeling.
Holiday Dessert Table
A holiday dessert table often includes richer desserts and more guests.
Use:
- Pie
- Cake
- Cookies
- Pastries
- Fruit
- Dessert plates
- Pastry server
- Cake server
- Serving board
- Tiered stand
Place items that need slicing on a flat surface and use the tiered stand for cookies, small pastries, or fruit.
Small Gathering Dessert Table
For a small group, keep the table simple.
Use:
- One main dessert
- One small tiered stand
- One board with fruit or bites
- Dessert forks or teaspoons
- Napkins
A small table can still feel complete when the pieces are arranged with care.
How to Keep the Table Clean and Easy to Use
A dessert table should stay attractive throughout the event, not only at the beginning.
The easiest way to keep it clean is to prepare for how guests will actually serve themselves.
Keep the Table Clean By
- Using the right serving utensil for each dessert
- Placing napkins near plates
- Keeping sauces in small bowls or pitchers
- Leaving space around desserts that need slicing
- Using boards or trays to contain crumbs
- Keeping extra plates nearby
- Removing empty packaging before guests arrive
- Keeping wet fruit away from dry pastries
- Placing trash or used plates nearby but not on the dessert table
Mess usually happens when guests do not know what tool to use. Place the tool where it belongs before the event starts.
How to Pair Dessert Displays with Flatware and Serving Pieces

A dessert table feels more refined when every piece looks connected.
The serving stand, pastry server, flatware, plates, cutting board, and napkins should feel like part of the same table.
Pair with Stainless Steel Flatware
Stainless steel dessert forks, teaspoons, and serving pieces create a polished look. They pair well with white plates, neutral linens, glassware, wood fiber serving pieces, and simple desserts.
Pair with a Tiered Stand
Use the tiered stand as the height piece. Keep surrounding items lower so the table does not feel crowded.
Place plates and utensils near the tiered stand, but not directly in front of it.
Pair with a Cutting Board
Use a cutting board for fruit, cheese, bread, croissants, or small bites. This brings warmth and texture to the dessert table.
A serving board also works well when the table includes both sweet and savory items.
Pair with Simple Plates and Napkins
Small white or neutral plates work best for most dessert tables. They allow colorful desserts to stand out.
Napkins should be easy to reach and placed in more than one spot if the table is large.
How to Store and Care for Dessert Serving Pieces
Dessert serving pieces should be easy to find when hosting.
Store them together when possible so the table can be set quickly.
Store Together
- Pastry server
- Cake server
- Small tongs
- Dessert forks
- Teaspoons
- Cheese knife
- Serving boards
- Tiered stand hardware
- Small plates
- Napkins or labels
After Every Use
- Wash food residue from serving pieces.
- Clean according to product care instructions.
- Dry fully before storage.
- Store flatware and serving pieces in a dry area.
- Keep tiered stand hardware together.
For Tiered Stands
- Disassemble if needed.
- Clean each tray carefully.
- Dry every part before storing.
- Keep screws, washers, and hardware together in one small bag or container.
- Store trays flat or upright where they will not bend or chip.
For Pastry Servers and Stainless Steel Pieces
- Wash after use.
- Dry promptly to reduce water spots.
- Avoid harsh scrubbers.
- Store separately from heavily used kitchen tools if possible.
A dessert table is easier to create when the pieces are clean, organized, and ready before the event.
Common Dessert Table Mistakes to Avoid
A dessert table can look crowded or difficult to use when the layout is not planned.
Mistake 1: Everything Is the Same Height
A flat table can look crowded and visually heavy.
Use one tiered stand or elevated piece to create structure.
Mistake 2: Too Many Dessert Types
Too much variety can make the table look cluttered.
Choose a focused menu and repeat colors or shapes.
Mistake 3: No Serving Utensils
Guests should not have to use personal forks or fingers to serve shared desserts.
Add pastry servers, tongs, spoons, or cake servers before the event begins.
Mistake 4: Plates and Napkins Are Hard to Reach
Put plates, forks, spoons, and napkins near the front or side of the table.
Mistake 5: Wet and Dry Foods Are Mixed Together
Keep juicy fruit, sauces, and cream-based desserts away from crisp cookies, pastries, and crackers.
Mistake 6: The Table Has No Focal Point
Use one main piece: a cake, tiered stand, dessert tray, or centerpiece.
A focal point makes the table easier to understand.
Shop Barenthal Dessert and Hosting Essentials
Barenthal 2-Tier Wood Fiber Cupcake Stand
A two-tier dessert and appetizer stand for cupcakes, pastries, fruit, snacks, tea parties, holidays, and table display.Shop Barenthal 2-Tier Cupcake Stand
Barenthal Couture 2-Piece Serving Set
A polished serving set with a gravy ladle and pastry server for sauces, gravies, desserts, pastries, and shared table moments.Shop Barenthal Couture 2-Piece Serving Set
Barenthal Stainless Steel Flatware
Polished flatware for dessert forks, teaspoons, table settings, and cohesive hosting.Shop Barenthal Stainless Steel Flatware
Shop Barenthal Composite Cutting Boards
Barenthal 2-Piece Carving Knife and Fork Set
A polished carving set for roasts, poultry, holiday meals, and larger hosting moments.Shop Barenthal Carving Knife and Fork Set

Frequently Asked Questions
How Do You Set Up a Dessert Table at Home?
Start with a clean table, choose one focal point, add height with a tiered stand, place larger desserts toward the back or center, and keep plates, napkins, and utensils within reach. Use a pastry server for sliced desserts and small tongs or spoons for bite-size treats. Leave space around each item so guests can serve themselves easily.
What Should Be on a Dessert Table?
A dessert table should include one main dessert, several smaller sweets, small plates, dessert forks or teaspoons, napkins, and serving utensils. A tiered stand, serving board, pastry server, and simple centerpiece can make the table feel more organized and visually polished.
What Desserts Go on a Tiered Stand?
Cupcakes, cookies, macarons, mini pastries, fruit tarts, brownies, tea cakes, truffles, and sliced fruit work well on a tiered stand. Heavier items should go on the lower tier, while lighter or smaller pieces can go on the top tier. Desserts that need slicing should stay on a flat surface.
How Much Dessert Do I Need Per Person?
For a light dessert after dinner, plan one serving per person. For a dessert table with multiple options, plan two to three small pieces per person. For brunches, tea parties, birthdays, or holiday gatherings, guests may enjoy several smaller items instead of one large dessert.
How Do I Make a Dessert Table Look Elegant?
Use one focal point, add height with a tiered stand, keep the color palette focused, arrange desserts by size, and use proper serving pieces. Stainless steel flatware, neutral plates, a pastry server, and a clean serving board can make the table feel refined without adding too many decorations.
Do I Need a Cupcake Stand for a Dessert Table?
A cupcake stand is not required, but it is very useful. It adds height, saves table space, and helps small desserts look more organized. A two-tier stand works well for cupcakes, pastries, cookies, fruit, tea sandwiches, appetizers, and holiday treats.
What Serving Utensils Do I Need for Desserts?
Useful dessert serving utensils include a pastry server, cake server, dessert forks, teaspoons, small tongs, serving spoon, and cheese knife. A pastry server is especially helpful for cake, pie, tart, cheesecake, brownies, and dessert bars because it supports each slice from underneath.
Can I Use a Cutting Board on a Dessert Table?
Yes. A clean cutting board can be used to serve fruit, cheese, bread, pastries, crackers, small desserts, or savory bites. It adds warmth and texture to the table and works especially well when the dessert table includes both sweet and savory items.
How Do I Keep a Dessert Table from Looking Crowded?
Use fewer dessert types, leave space between items, add height with one tiered piece, and group similar foods together. Keep plates, napkins, and utensils near the front or side. Avoid filling every inch of the table; open space makes the display feel more polished.
How Do I Style a Dessert Table for a Small Gathering?
Use one main dessert, one small tiered stand, one serving board, dessert forks or teaspoons, and napkins. Keep the color palette simple and choose desserts that are easy to serve. A small dessert table can still feel complete when the layout is clean and intentional.
What Is the Best Layout for a Dessert Table?
A simple layout places taller items in the back, medium-height trays or boards in the middle, and plates, napkins, and utensils in the front. This keeps the table easy to use while giving the display visual depth. For larger events, leave space on both sides so guests can move comfortably.
What Is the Difference Between a Dessert Table and a Dessert Station?
A dessert table is usually a styled display where desserts are presented together. A dessert station is more interactive and may include build-your-own elements, such as toppings, sauces, ice cream, coffee, tea, or plated service. Both need clear layout, serving tools, and enough space for guests.
Final Thoughts
A dessert table does not need to be extravagant to feel special.
With one focal point, a tiered serving stand, a clean serving board, dessert utensils, small plates, and a thoughtful layout, even a simple spread can feel polished and inviting.
The strongest dessert tables are easy to use. Guests know where to start, what tools to use, and how to serve themselves comfortably. The food looks beautiful, but the table still works.
Use height to create interest. Use serving pieces to create control. Use flatware, plates, and napkins to make the experience easy. Keep the table balanced, clean, and ready for the moment.
Create the table with intention. Serve dessert beautifully. Make every gathering feel a little more complete.