
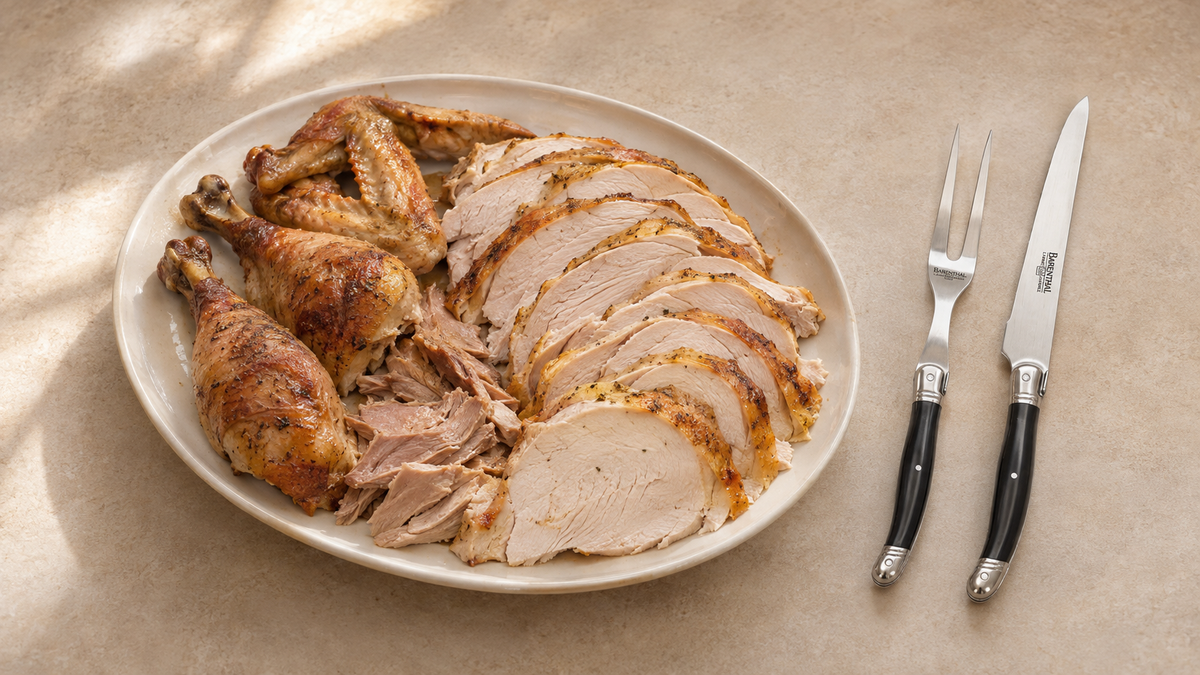
A turkey can come out of the oven beautifully browned and still be awkward to serve. The breast curves around the ribs, the legs hide their joints, and a crowded cutting board leaves little room to see where the knife belongs.
To carve a cooked turkey, rest it for about 20 minutes, remove the legs and wings at their joints, lift off both breast halves, and slice the breast meat across the grain. [1–4]
This guide covers carving a fully cooked, unstuffed whole turkey for Thanksgiving or another family meal. Keep it open beside your workspace and follow one section at a time.
Before you start
Confirm doneness before carving. USDA specifies a minimum internal temperature of 165°F for turkey, checked with a food thermometer in the innermost thigh and wing and the thickest part of the breast. A browned exterior does not replace those measurements. [5]
Illinois Extension and Butterball both use a resting interval of about 20 minutes. Resting comes after cooking; the turkey must already have reached the safe internal temperature. [1, 2]
Set out clean equipment for the cooked bird. Keep it away from utensils, boards, and juices that contacted raw poultry. Wash your hands and clean food-contact surfaces before you begin. [6]
Set up a carving station that gives you room to work
Use a stable board, plus a second clean board or holding platter for removed sections. Keep the serving platter nearby so the main board stays clear for slicing. [3]
|
Item |
What it does |
What to check before carving |
|---|---|---|
|
Sharp carving knife or chef’s knife |
Separates sections and slices meat |
The blade is suitable for the task and the handle feels secure |
|
Carving fork |
Steadies the turkey |
Your supporting hand stays clear of the cutting path |
|
Large cutting board |
Supports the whole bird |
The turkey fits with working room around it |
|
Second board or holding platter |
Receives sections as they come off |
It is clean and within reach |
|
Serving platter and serving utensil |
Holds the finished portions |
Guests can lift slices without reaching for the carving knife |
|
Food thermometer and shallow containers |
Check doneness and store leftovers |
Both are ready before the meal begins |

A groove can collect some of the juices, but it does not make an undersized board large enough. Check the bird’s actual footprint and leave space for the blade to move. If the turkey overhangs the usable surface, use a larger board.
Barenthal’s XL reversible cutting board is listed at 18.8 × 15.6 inches and has a juice groove and non-slip feet. Compare those dimensions with your turkey and counter before choosing it for the job. [9]
For the blade and supporting fork, the Barenthal 2-Piece Carving Knife and Fork Set pairs the two tools in one set. Its product instructions specify care for natural wood handles; hand wash the set after use. [10]
A sharp chef’s knife can also handle the carving sequence. For the differences between preparation blades and table knives, see what kitchen knives you actually need.
How to carve a whole turkey
1 Position the turkey and remove the trussing
Set the turkey breast-side up and remove all trussing. Steady it with the fork in your non-cutting hand. [4]
Lay the knife flat on a clear part of the board, with the edge away from your hands, before repositioning the turkey or equipment. The person carving needs a clear working area; have another person carry finished platters to the table.
2 Remove each leg and thigh together
Cut the skin between one thigh and the body. Gently move the leg outward and down so the hip joint becomes visible. Cut through the joint to release the whole leg quarter, then move it to the holding platter. Repeat on the other side. [2]
You are looking for the place where the bones meet. If the knife meets solid resistance, stop and adjust the angle until you can see the joint. Do not try to solve the resistance by pressing harder through bone. [1]

3 Separate the wings
Untuck a wing if it is folded behind the turkey. Move it away from the body, open the skin around the attachment, and cut through the exposed joint. Remove the second wing the same way and place both with the other sections. [3]
Keep these pieces together so they are easy to identify when you arrange the serving platter.
4 Lift off the breast halves
Find the central breastbone. Cut close alongside it, following the ribs while easing the meat outward with the fork. Lift off the breast half in one piece and repeat on the other side. [3]
Keep the blade near the bone to leave less meat behind. Once both halves are off, move the carcass out of the cutting area so you have room for slicing. [3]

5 Slice the breast across the grain
Set one breast half skin-side up. Look for the direction of the muscle fibers and cut across those lines. Use long, controlled strokes to make slices about ¼ to ½ inch thick, adjusting the thickness to the portions you want to serve. [4]
Keep the slices grouped as you cut so they can move to the platter together. Repeat with the second half. If the skin catches, steady the meat and use a deliberate slicing stroke instead of pressing straight down. [4]

6 Finish the thighs and drumsticks
Find the joint between a thigh and its drumstick and cut through it. Leave the drumstick whole for serving. Cut the thigh meat away from the bone, check for remaining bone or firm tendons, and slice the meat into portions. Repeat with the other leg. [1]
Put the thigh meat beside the breast slices rather than underneath them. Keeping the two visibly separate makes it easier for guests to choose.
7 Arrange the platter and serve
Lay the breast slices in overlapping rows and place the dark meat and wings alongside. Keep the handles of serving utensils accessible instead of burying them under the meat. Leave the carving knife at the workstation.
If your platter becomes crowded, use a second one. A smaller platter that guests can pass comfortably is more useful than a large display that is difficult to lift.
For serving tools for the other dishes, use our guide to serving utensils for family-style meals.
Fix the problem before making the next cut
Most interruptions during carving can be handled by pausing and checking the setup. Use the visible symptom to decide what to change.
|
What happens |
What to check |
What to do next |
|---|---|---|
|
The blade stops at a leg or wing |
Is the edge against bone rather than the joint? |
|
|
Breast slices break into small pieces |
Is the meat supported and are the strokes controlled? |
Place the breast flat on the board and use deliberate slices [4] |
|
There is nowhere to put the next section |
Is the main board holding both the bird and finished portions? |
Transfer removed sections to the holding platter [3] |
|
The board moves when pressure is applied |
Is the work surface level and the board stable? |
Stop, reset the board, and check it before continuing |
|
The platter looks crowded |
Are the portions stacked too deeply to lift? |
Divide the meat between two serving dishes |
Do not chase identical slices at the expense of a safe grip. A few uneven portions are easier to serve than meat that has been repeatedly cut into smaller fragments.
Store the leftovers promptly
Count resting, carving, and serving time together when tracking how long the turkey has been out of temperature control. Refrigerate perishable leftovers within two hours, or within one hour when the surrounding temperature is above 90°F. Divide the meat into shallow containers and keep the refrigerator at 40°F or below. Use refrigerated leftovers within three to four days, or freeze them for longer storage. [7]
Reheat leftovers to 165°F throughout, checking more than one spot with a food thermometer. [8]
Put the containers near the carving station before dinner so storing the remaining meat is part of clearing the meal, rather than a task left until later.
Frequently asked questions
Do you carve turkey breast on the bird or remove it first?
Both approaches exist. Butterball describes slicing breast meat while it is still on the bird; this guide uses the whole-breast removal method so the meat can lie on the board for slicing. Choose one sequence and follow it consistently. [2]
Can you carve a turkey with a chef’s knife?
Yes. A sharp chef’s knife can be used instead of a dedicated carving knife. Choose the tool you can control comfortably and keep the turkey steady with a carving fork. [1]
How thick should turkey breast slices be?
About ¼ to ½ inch is a practical range. Keep the breast skin-side up and cut across the grain. Match the portion size to how you will serve the meal. [4]
Can you carve the turkey hours before serving?
Do not leave carved turkey on the counter for hours. If preparing it ahead, refrigerate it promptly in shallow containers and reheat it to 165°F before serving. Keep the storage limits above in view. [7, 8]
Do you need a separate knife for guests?
The carving knife belongs at the carving station. Give guests their normal place settings and put a serving fork or tongs with the platter so they can lift portions without handling the carving tools.
Put the carving station on your hosting checklist
Before the turkey is ready, decide where the bird will sit, where the removed sections will go, and who will take the finished platter to the table. That small amount of preparation keeps the final minutes of cooking from turning into a search for equipment.
Browse Barenthal cutting boards to compare workspace options, and use the holiday hosting checklist to finish planning the rest of the meal.
Sources
1. University of Illinois Extension — Carving. Resting, joint separation, thigh preparation, and knife options.
2. Butterball — How to Carve a Turkey. Leg and wing removal, resting, and the alternative on-bird breast method.
3. National Turkey Federation — How to Carve a Turkey. Workspace organization and removal of whole breast sections.
4. Shady Brook Farms — How to Carve a Turkey. Breast removal, grain direction, slice thickness, and slicing technique.
5. USDA FSIS — Turkey internal temperature. Cooking temperature and thermometer placement.
6. USDA FSIS — Keeping foods safe. Clean equipment and separation from raw poultry.
7. USDA FSIS — Handling leftovers safely. Refrigeration timing, shallow containers, and storage duration.
8. USDA FSIS — Reheating leftovers safely. Reheating temperature and checks in several places.
9. Barenthal — XL reversible cutting board. Dimensions and stated product features.
10. Barenthal — Carving knife and fork set. Set contents and handle care.